About Me

My photo
I’m a diy, penny pinchin’, first time home owner, wife to my amazing helper of a husband, one sweet little type 1 diabetic daughter and one smart creative little boy(or should I say young man!). There isn’t a thing I won’t buy if I think I can make it myself. So I hope you enjoy my attempt to save a little money and share my attempts to make our house a home.

Shop adore:made

Showing posts with label clothing. Show all posts

Friday, March 23, 2012

Obsessed, addicted, Can't get enough....

Goodwill!!! I HAVE to go there at least once a week! I literally begin to have withdrawls. I am not sure why I feel that way...I often think I am missing out on something and if I don't go NOW it will be gone. And the truth is just that! I have tremendous luck there but I think it's because I go there sooooo often I know what to look for, I know the in's and out's of the place. If you don't second hand shop and often, chances are your probably missing out too! This week ( and I hope to do this post twice a month at least) I found a pair of boots I have been eying for 2 years! The first year a co-worker(yes I used to have a real JOB!) came in wearing the cutest gray tone boots. Real leather, just enough heal, not to pointy or round toe and of all places she got them at Target! For...get this... 50 bucks! So I rushed down there and NOTHING. I was heart broken....so I went on line not my size, and have yet to have that color in my size. So this week strollin' a long with not much luck I meandered over to the books with the little miss, she gets a book every time we go amongst other great things. On the way to books we passed by the shoes and what to my wondering eye did appear???? The BOOTS, the boots I have been dying to have in mint condition, size sticker on the bottom still attached, they fit like gloves....for feet of course and were $7.99(goowill pricing is soooo random!)!!! I am sure the people in the store thought I was crazy squealing with delight at a pair of used boots and little miss was like sheesh...."find me in the books woman" I pranced around in the store wearing the boots happy as could be, I  decided to keep looking after all my "new" boots need a new outfit....right?? So this weeks find.....

Brand new target brand fair isle skirt XXL yep I still bought it and altered that baby! 6.99
Awesome like new gray Old Navy sweater - 4.99
and the BOOTS! 7.99
Yes I LET my loving husband take this picture which he HATES doing - its WWII every time!

Little miss got a great leap frog toy, brand new cream with black dot tights and book, no surprise there...I also managed to find a gray rosette'ish neck line long sleeve tee( we have snow on the ground spring or not) and a leopard print sweater which I have been keeping my eye out for - my grand total 38 and some change!!!

You may not always do as well as me since I seem to have the goodwill gods shining down on me ;) Good luck thrifting!

Tuesday, March 20, 2012

Twirl skirts, a little girls dream come true

Ava took a scrap and put it on Sunny's head and said "look she's an artist dog" ;)


I make: A LOT: and I have been holding hording this polka dot fabric for something fabulous for the little miss. And wouldn't you know I had plenty of fabric and just the right amount of black elastic for this tutorial: http://www.danamadeit.com/2008/07/tutorial-the-circle-skirt.html

In case you are wondering Ava is about a 4t and her broke down measurements according to the geometry were 3.8 inches for the waist(22+2, don't judge she's got a nice layer of baby fat;)  and 13 inches in length =) The wide elastic probably should have been longer but I used 19 inches(that's all I had left) 20" would have been great!

This was super easy because I slightly cheated and opted to only serge the edges rather then trying to fold and hem a curved line(so frustrating for me but totally do-able) and fast. Fast and easy + DIY = ME!

She is so super excited to wear it too! Oh and of course twirl for hours....it's a weird thing she does daily anyways :) This tut was easy to follow, the math yes scary but really NOT that bad and I can only imagine how much funner this would be with an additional layer....coming up next ! Thanks Danamadeit!

**Actions shots**

Check out that hot pink hair!


<3


Monday, March 19, 2012

Barbies....getting to that stage of life already


Ava is on the heels of her 4th birthday and is really getting into imaginative play and BARBIES seem to be her toy of choice the last few days....maybe because she can talk her big brother into playing with her (I think it has something to do with barbie eye candy but gross! Let's just say he's s super sweet hunk of a brother!) She has a random assortment of barbie stuff all bought by her grandparents :D I decided if she was really into it how hard can it be to make her some non-scandalous dress's turns out NOT thanks to craftiness is not optional's tutorial! She is totally in love with the first dress I made and I see many more in our future. I made a few slight modifications but in general this is a great tutorial and definitely a great way to use up all my scraps of fabric! Off to find some shoes today for her random barbie collections to coordinate with all the new dress's we've dreamed up!
Lining up her barbies - so toddler and taking their picture :O so me!
what a GREAT brubba!
Muah! These 2 really love eachother

Wednesday, February 29, 2012

Love this Boy!!

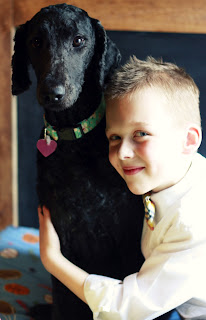
Finally a little sewing for the boy and some super duper bribing for pictures but as you can see he did enjoy himself a little but to get him to commit is so hard.....Bow ties available @ www.adoremade.etsy.com (including the one pictured, soon). Working on a pattern too....stay tuned! Also working on MANUAL MODE practice makes perfect I suppose when it comes to DSLR cameras!!! What better way to celebrate a snowy day?!

Sunny loves to sneak up onto his bed ;)

So Studious

Rawk the Hawk

Look at those lips

Heart....melt......


Seriously no smiling ;)

Book Worm

www.adoremade.etsy.com

A boy and his dog....does it get any better??

See I told you! He really loves a camera all up in his face from his crazy momma!!

Monday, February 27, 2012

Toddler Sun hat

the little lady photo by: The Mrs.
 I pinned the pattern about a week ago and hit up the fabric store (girls trip) yesterday and bought a bunch of fabric that I had loosely planned for but it's all so fun and springy I thought "hey I should make that hat" so I started it last night and wouldn't you know we woke up to a blanket of snow :O just how my world turns....oh well the little lady is already planning on having one for every outfit for out beach trip in April :D these are addicting so unless you have the time don't even attempt! For your sewing pleasure I am linking the pattern I came across and the sew along I happened to find which is waaaayyyyyy easier then the way the book says it should be done( I am referring to this pattern also being in the Oliver and S book

Pattern and instructions: http://www.melaniefalickbooks.com/storage/STCCraft_OliverS_BucketHatPattern_.pdf

Sew along (highly recommended) : http://alittlegray.blogspot.com/2011/08/lttsa-bucket-hats-part-3-look-no-hand.html

photo by: The Mrs
I am a PERFECTIONIST so I pressed and pressed every seem and top stitched every inch of the hat possible. It does run a little small too! I made the large for my very averaged sized small headed three year(who are we kidding almost FOUR!) old I think it will last her a couple years though but totally wearable xoxo enjoy!

Not a sewer?! Check out www.adoremade.etsy.com

Tuesday, February 14, 2012

Happy Valentines Day!

Little Ladies Heart Hair - how to found on Pinterest

Mom Tattoo T-shirt DIY
I won't lie we are lucky girls, the little lady and I, loved tremendously by a couple of handsome lads! Every year Valentines rolls around and we don't do much maybe a little treat for the kids a late dinner just me and hubs.....We love eachother a lot all year round there is no way I could show my family how much I love them in just one day but it sure is a nice reminder to celebrate LOVE! Happy Valentines Day

I whipped up a little "tattoo" T for Ava's Open Gymnastics Gym play date realizing her dress from last year wasn't going to cut it! Literally this took me a half hour and had I known it was going to turn out so darn cute I would have documented my DIY! But I will do my best to break it down and hopefully inspire a little creativity, and HECK this would be great for mother's day too....I can just see the hubs and the little man sporting these bad boys come mother's day ;)

Mom Tattoo T DIY 
Supplies - Red felt, scrap of white felt, freezer paper, black fabric paint, heat and bond lite(optional but helps hold it in place to stitch on) 
1:Print MOM on to a piece of freezer paper(cut it to paper size print on the non shiny side) 
2: Use and exacto knife to cut out the letter be sure to save the middle of the O
3: Iron freshly made MOM stencil on to scrap white felt
4: paint over stencil with black fabric paint and allow to dry
5: Cut large heart shape out of red felt (I decided to use the heat on bond after I cut my shapes so I just cut it slightly smaller then the heart then ironed it on according to the directions)
6: Cut white felt into a long strip (like picture) fold length wise and cut an angle to create the points I cut with a slight curve instead of straight on for a little character
7: place "MOM Ribbon" over heart and straight stitch on not going over the edge of the heart
8: Heat and bond heart with sewn ribbon to shirt I used a pressing cloth so as to not melt the felt
9: Stitch the outer of the heart with a longer straight stitch for a hand stitched look(not I did not stitch the over lapping "ribbon" tails down, it gave it a fun ribbony look) :D 
10: Enjoy Valentines Day!

Wednesday, February 1, 2012

5 dollar, 5 step Mod Skirt - Tutorial! 18 mo. to 5T


Color block skirts are back and oh so modern! I have seen a couple of tut's on how to make one but I didn't want to get down with the fussy time consuming waste bands, love the results of the more time consuming ones, but a lot of people aren't brave enough to attack all that (ruffling especially, which is one of my favorite things!). So this is my Easy, Cheap and Fast version which is just the way I like it ;) Enjoy! 

Supplies: 2/3 yard Solid Fabric for skirt body(pictured in peach), 1/2 yard contrasting fabric for hem(pictured in lavender), 1 1/2 inch wide elastic(gives it a more waste band feel, helping it lay flatter), thread, safety pin,pins, sewing machine, rotary mat and ruler.
Cost break down 2/3 yd.  fabric 1.97, 1/2yd. fabric 1.50, 1 1/2" elastic 1.37@ Wal-mart.


Sizing:
18/24 Skirt: 9x18 Skirt Hem: 7x18 Elastic: 17
2T     Skirt: 10x19 Skirt Hem: 7x19 Elastic: 18
3T     Skirt: 11x20  Skirt Hem: 8x20 Elastic: 19(the size I made for the tutorial)
4T      Skirt: 12x21 Skirt Hem: 8x21 Elastic: 20
5T      Skirt 13x22  Skirt Hem: 8x22 Elastic 21

**These measurements have not all been tested they are based of US sizing charts(and tons of trial and error sewing skirts for my little one). For best results measure your little one for elastic(minus 2" from waist measurement for proper elastic fit) and length, ie: skirt+hem- seem allowances of approx 2" will give you an idea how long the final product will be. If you have questions as always feel free to email me :)

1: Cut Fabric according to above sizing with a rotary cutter, ruler and self healing mat - strip cutting works best with a rotary.


2 pieces 11x20 for skirt body & 2 pieces 8x20 for hem (3T)
2: Sew short ends of skirt together set aside, sew short ends of hem together. Press all 4 seems open with an iron. Fold hem wrong sides together length wise and press (a-lot!)

Wrong sides folded together to create a 4x40 hem band
3: Pin hem to skirt right sides together(either side of the hem is technically the right side) make sure your matching up raw edges when pinning, and lining up seems. Pin every couple of inches to keep the layers of fabric from shifting while you sew. Flip hem down press raw edge up towards waist and top stitch.
Top stitched
4: Fold top down about a 1/4" while pressing with an iron, fold down another 1 3/4"' press with iron. Stitch closed about an 1/8 inch from edge leaving a 2 inch opening for the elastic.
Elastic casing and opening

5: Feed elastic through the opening with a large safety pin(I like to use a straight pin to hold the other end of my elastic to the fabric so I don't lose it while I am pulling the other end through) sew elastic together with a zig-zag stitch reversing to secure at the beginning and end, even out fabric around the elastic and sew opening closed!!!!!! Your DONE 5 Bucks and 5 steps to a great MOD skirt!
I think she lurv's it!
The important stuff! Please do not re-use this tutorial as your own idea - you may however share it all you want and are more then WELCOME to sell any finished products you make using this tutorial(if you have the time and patience to do so!)